
Categories
- All Categories
- 1.4K Cubism Editor
- 1.2K Help
- 54 Tips and Tricks
- 197 Feature requests
- 50 Other Live2D Products and Tools
- Cubism Viewer (for OW, for Unity)
- 3 Material Separation Photoshop Plug-in
- 47 Other Live2D Products and Tools (Other Photoshop Scripts, Sample Data, etc.)
- 301 Cubism SDK
- 266 Help
- 11 Tips and Tricks
- 24 Feature Requests
- 180 Community
- 38 General Discussions
- 10 Feature Requests
- 26 Projects, Showcase & Critiques
If you have any questions, reports, suggestions, or requests about Live2D, please send them to this forum.
※We cannot guarantee statements or answers from Live2D staff. Thank you for your understanding in advance.
Live2D Cubism
Cubism Products and Downloads
Cubism product manuals and tutorials
Cubism Editor Manual Cubism Editor Tutorial Cubism SDK Manual Cubism SDK Tutorial
※We cannot guarantee statements or answers from Live2D staff. Thank you for your understanding in advance.
Live2D Cubism
Cubism Products and Downloads
Cubism product manuals and tutorials
Cubism Editor Manual Cubism Editor Tutorial Cubism SDK Manual Cubism SDK Tutorial
[Regarding macOS Tahoe](Updated October 16, 2025)
macOS v26 Tahoe is now supported!
We advise against upgrading your macOS at this time as it may cause Live2D products not to function correctly.
Upgrading macOS can also cause you to lose your Cubism Editor license file.
Please make sure to deactivate your Cubism Editor license before upgrading the macOS.
For more details:
https://help.live2d.com/en/other/other_09/
For inquiries regarding issues with license purchases or license activation errors, please contact us through the email form.
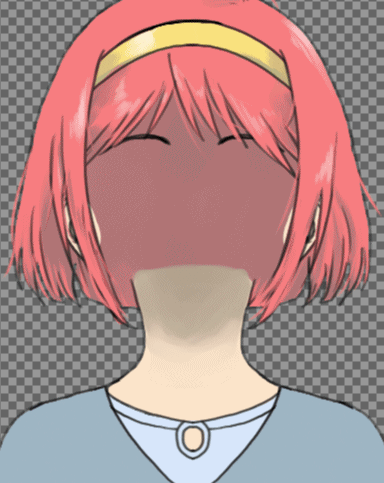
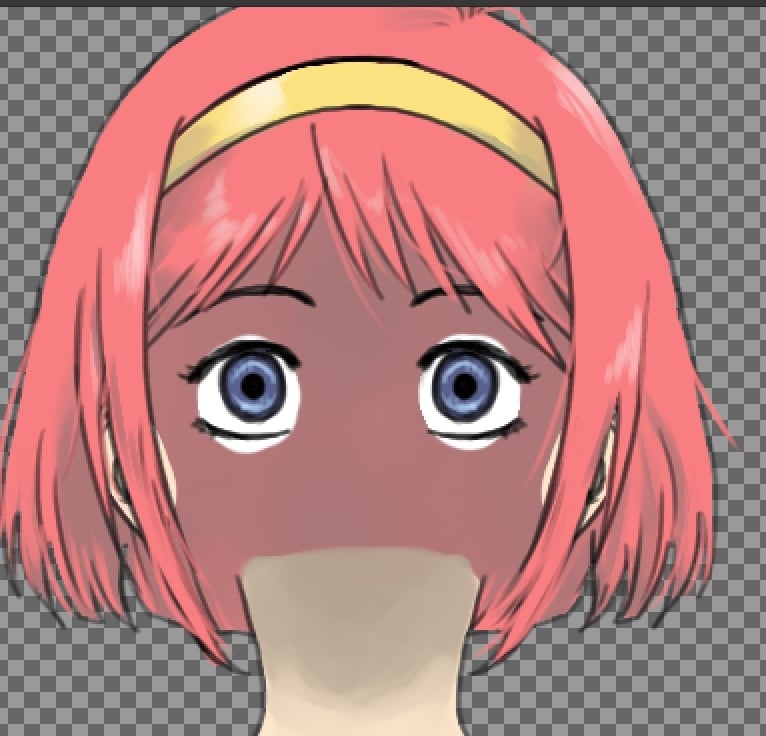
Modeling 101: layering the character

hello!
here's a quick tutorial on the basic layering needed to easily open your character into Live2D Cubism ^^
(this is what the current templates use, so if you're just starting out with Live2d you should probably do it this way)
the eye layers will look like this in the layer window from top to bottom:
eye crease (optional)
eyelash top (the eyelash line at the top)
eyelash bottom (the eyelash line at the bottom)
eyelid top (to hide anything on top of the top eyelash)
eyelid bottom (to hide anything below the eye)
eye gleam (the light in the eyes, optional)
pupils (named eyeball in the templates)
sclera (the white part)
face (the actual face, below ALL of the above)
they will look like this:
b ) using the masking feature introduced in Live2D cubism 2.1
(this requires some experience with the program, the default templates do not use this feature yet)
with this method you will not need the eyelids, the layers will look like this:
eye crease (optional)
eyelash top
eyelash bottom
eye gleam
pupils
sclera
face
lip top (the lip and an opaque surrounding it to hide the open mouth)
lip bottom (the bottom lip and an opaque surrounding)
teeth (top and bottom or just top, most characters do not need a bottom set)
mouth open (the inside of the mouth we can see when the character opens their mouth)
face
it is possible to use the masking option with the mouth as well, but i don't like it (# ゚Д゚) my characters have weird mouths so i won't explain how it works until i get the hang of it
3- the hair
usually the hair is separated into three (or more) layers
bangs (at the very top of everything)
hair side (the side bangs, just below the bangs, but in my previous pictures the hairstyle actually had the side hair above the bangs)
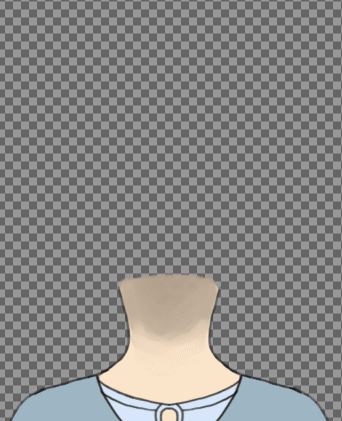
face and everything on the face (eyes, nose, eyebrows, mouth)
hair back
4- import PSD + apply template!
i will try to write another article about applying the template, since it confused me a lot when i first started out. if you're in a rush, try to understand it through trial and error
you do it by going to File -> Apply template > Chitose or Epsilon > OK
it will show you the character on top of yours, resize it to fit and then go to the big button on top > Apply Template Preview
and right-click back and forth between the different parts and match up any mismatched body parts
click OK and you've just applied a template! good luck with those wonky eyes xD
FAQ:
1- do i need to name the layers a certain way?
nope, name them whatever you want, just try to keep the letters English to be safe from any language conflicts with the program.
2- can i add other parts such as wings or a necklace that aren't there in the template?
of course! all you need to do is add them to the deformer closest to them or give them their own deformer
3- how do i add the other parts? where do i put them?
just draw them in the PSD naturally, they will show up in the Editor with the rest of the parts.
4- what if my character can't match the templates? what if she has three eyes? or cat ears? or wings? what if it's a dragon?
no problem! you can either:
a- apply the nearest template and create new deformers for the parts that don't match, or:
b- learn to create deformers from scratch
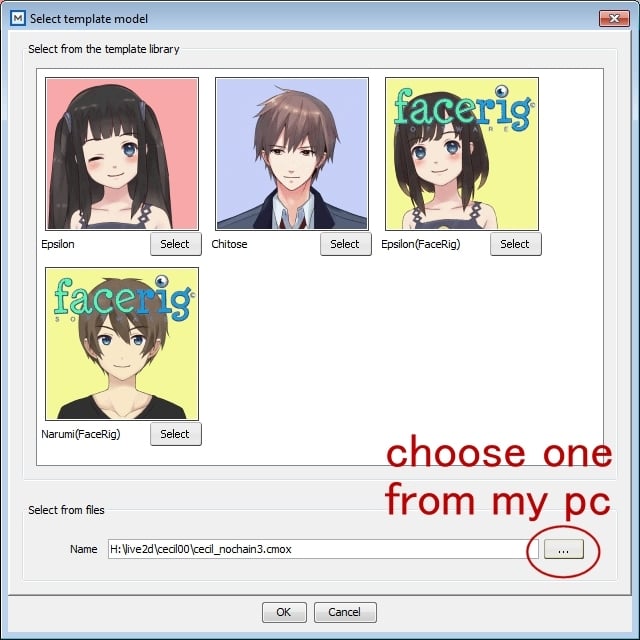
c- use any of your previous characters as a template! that's right, every model file you have (.cmox) can be used as a template!
to use your character, just click here and choose any of your previous characters that match closely to the new character, and Editor will use it as a template!
if you have any questions go ahead and ask, i will either reply here or add a new thread to the how to section if i can explain it at length ^^
here's a quick tutorial on the basic layering needed to easily open your character into Live2D Cubism ^^
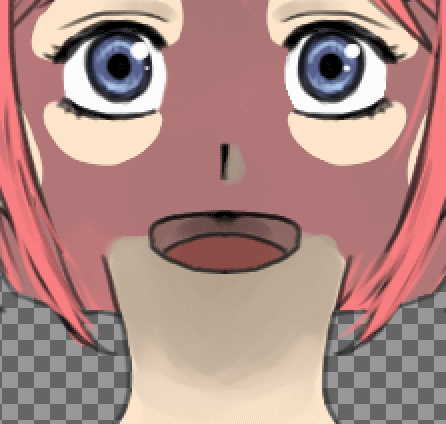
1- the eyes
there are two ways, a) creating the eyelids in a solid color to hide what's under them(this is what the current templates use, so if you're just starting out with Live2d you should probably do it this way)
the eye layers will look like this in the layer window from top to bottom:
eye crease (optional)
eyelash top (the eyelash line at the top)
eyelash bottom (the eyelash line at the bottom)
eyelid top (to hide anything on top of the top eyelash)
eyelid bottom (to hide anything below the eye)
eye gleam (the light in the eyes, optional)
pupils (named eyeball in the templates)
sclera (the white part)
face (the actual face, below ALL of the above)
they will look like this:
b ) using the masking feature introduced in Live2D cubism 2.1
(this requires some experience with the program, the default templates do not use this feature yet)
with this method you will not need the eyelids, the layers will look like this:
eye crease (optional)
eyelash top
eyelash bottom
eye gleam
pupils
sclera
face
2- the mouth
the mouth consists of four parts, from top to bottom they will look like this in your layer window:lip top (the lip and an opaque surrounding it to hide the open mouth)
lip bottom (the bottom lip and an opaque surrounding)
teeth (top and bottom or just top, most characters do not need a bottom set)
mouth open (the inside of the mouth we can see when the character opens their mouth)
face
it is possible to use the masking option with the mouth as well, but i don't like it (# ゚Д゚) my characters have weird mouths so i won't explain how it works until i get the hang of it
3- the hair
usually the hair is separated into three (or more) layers
bangs (at the very top of everything)
hair side (the side bangs, just below the bangs, but in my previous pictures the hairstyle actually had the side hair above the bangs)
face and everything on the face (eyes, nose, eyebrows, mouth)
hair back
4- import PSD + apply template!
i will try to write another article about applying the template, since it confused me a lot when i first started out. if you're in a rush, try to understand it through trial and error
you do it by going to File -> Apply template > Chitose or Epsilon > OK
it will show you the character on top of yours, resize it to fit and then go to the big button on top > Apply Template Preview
and right-click back and forth between the different parts and match up any mismatched body parts
click OK and you've just applied a template! good luck with those wonky eyes xD
FAQ:
1- do i need to name the layers a certain way?
nope, name them whatever you want, just try to keep the letters English to be safe from any language conflicts with the program.
2- can i add other parts such as wings or a necklace that aren't there in the template?
of course! all you need to do is add them to the deformer closest to them or give them their own deformer
3- how do i add the other parts? where do i put them?
just draw them in the PSD naturally, they will show up in the Editor with the rest of the parts.
4- what if my character can't match the templates? what if she has three eyes? or cat ears? or wings? what if it's a dragon?
no problem! you can either:
a- apply the nearest template and create new deformers for the parts that don't match, or:
b- learn to create deformers from scratch
c- use any of your previous characters as a template! that's right, every model file you have (.cmox) can be used as a template!
to use your character, just click here and choose any of your previous characters that match closely to the new character, and Editor will use it as a template!
if you have any questions go ahead and ask, i will either reply here or add a new thread to the how to section if i can explain it at length ^^
Comments
How nice , easy to understand in the GIF image .
Thank you for writing a tutorial !
Hi renoa! ))) Thx for your express tutorial!
Im rookie, so can you tell me where can I find detailed info about the "clippin mask". how to apply it, where it's location in menu of the program e.t.c.
I just found out that i can use the "clippin mask" only with the SDK? so where can i find it then?))
I will appreciate any information!)))
I'm using a 3d character made in daz and rendered and put her into photoshop.
I'll try again after I calmed down a little lol...